Throughout these tips I will refer to the Gutenberg editor. This page explains what the Gutenberg editor is. If your editor looks like the screenshot in that page you are using Gutenberg, otherwise you are using the classic editor, maybe with a page builder (e.g. Elementor, WP Bakery, Divi) built on top of it.
Tip #1: Going back in time
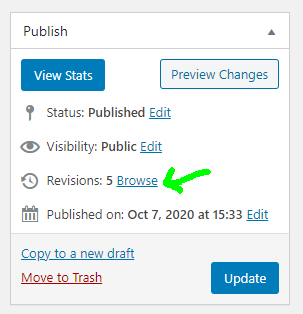
After you’ve made your first update to a post, you’ll start creating a revision history. A new item will appear under the post settings called x revisions
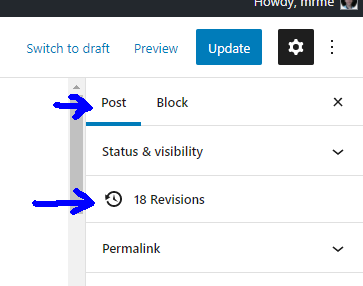
Clicking this will show you a timeline of all changes to the post.
Warning
The revision history harms performance and there are many plugins that will prune the revision history to speed up the website. Don’t rely on this history always being present. Rather it’s a quick way of undoing mistakes. Some plugins may also remove this feature entirely, although, in our opinion that’s a little extreme.
If you’re using the classic editor, you can get to the revision history here
Tip #2 Reorder Blog Posts and Products
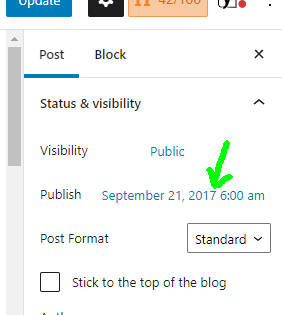
By default posts are ordered by date. You can actually change the date a post was published. This is the easiest way of reordering posts. Simply click on the date to change it, and then make sure you click update when done.
And in the classic editor
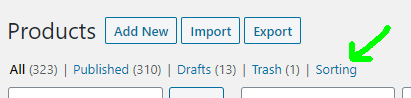
For those who have a WooCommerce store, there is a nifty feature to reorder products that most people never notice. It’s located here:
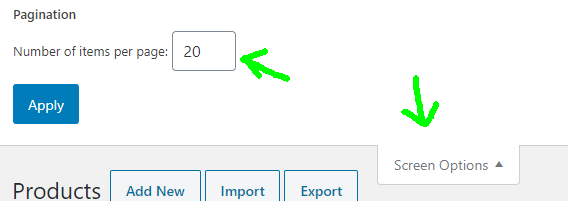
After clicking it you will be able to drag products around to reorder them. Changing the following can also be helpful when you have lots of products to reorder.
Tip #3: Duplicating Pages
Option A)
Use a plugin to duplicate pages
Option B)
If you’re using Gutenburg this is super easy. Just do the typical Ctrl+a, Ctrl+c, Ctrl+v. All of your styling is preserved when you copy Gutenberg blocks.
If your using the old classic editor, things get a little bit trickier:
- Switching tabs on your page editor to go from visual mode to text mode. If you’re using a page builder you’ll need to switch to the normal WordPress editor first.
- Copy the contents of the text editor.
- Create a new page, switch to text mode, and paste in the contents.
- That’s it. You can now switch the page editors back to visual mode.
Tip #4 Limiting what a user can do
You don’t have to grant admin privileges to every user who writes content on your website. When editing a page the following roles are available to you:
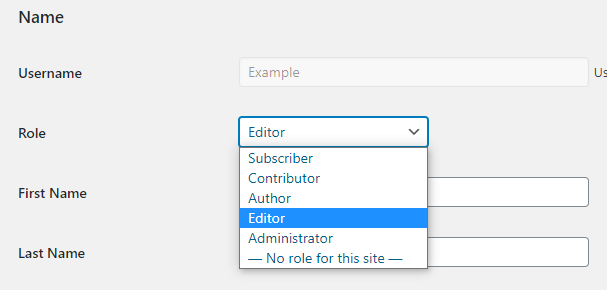
Editors have full access to manage all posts and pages.
Authors are only able to edit their own posts and pages.
Descriptions on the other user roles can be found here (ignore the super admins. That’s not an actual user role on most WordPress installations).
Tip #5: Viewing Trashed Posts
From the pages page, above the table there are a few blue links. One of them says trash.
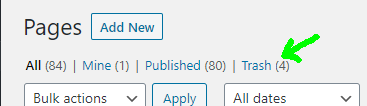
If this link is not there, there are no trashed posts.
Warning
Many performance plugins will prune the trash and some will completely remove this feature. Don’t rely on trashed posts sticking around forever.
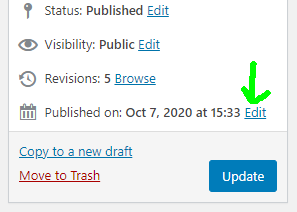
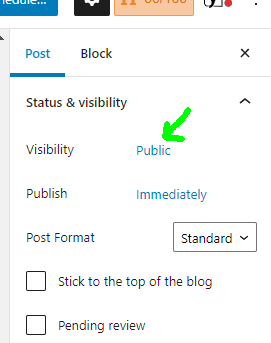
Tip #6 Mark Post as Private
Look here
Or for the classic editor
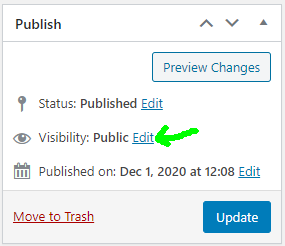
There are four options available to you:
- Draft: Reverting a post back to a draft is one way of making it private
- Private: This makes the post only visible to those who have the ability to edit the post.
- Public
- Password Protected
If you’re wanting a membership system to hide content behind a paywall, there are membership plugins out there that can help you out, but you may want to get a developer to set it up for you.
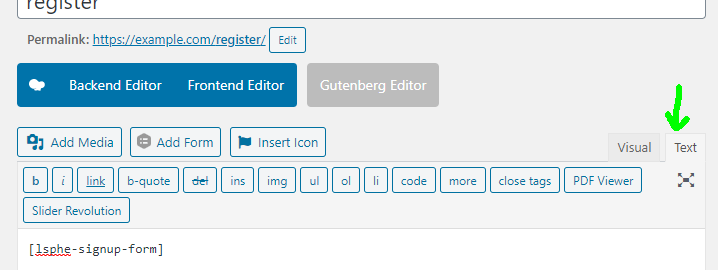
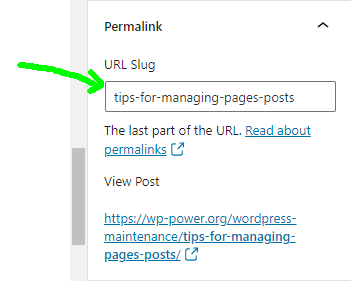
Tip #7: Editing the URL
If you’re using Gutenburg, you can edit the last part of the URL here:
In the classic editor go here
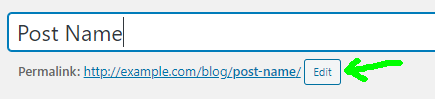
However, very important, changing the URL can harm SEO. If the post has been published for awhile make sure you add a redirect from the old URL to the new URL.
That only changes the URL slug however, if you want to change how the rest of the URL is structured, go to the appearance > permalinks admin page, and a few different options are presented to you.
Tip #8: Improving a Page’s SEO
Using a plugin such as Yoast SEO or All in one SEO pack will provide you with statistics about your pages, and can help you write more SEO friendly posts. And this guide can help you create an SEO plan.
However, I would caution against using this as your main SEO metric. The original Page Rank algorithm that Google uses would calculate ranking based based on 2 main factors: a) When a site links to you, how big is the ranking of that website in Google’s system, and b) How many sites does that website link out to. Is it a social media site that links out to everyone so it’s no big deal, or are you one of a few links from a highly ranked site? Also if Google detects you’re being spammy with links to your website you can be negatively impacted, so be careful there.
Tip #9: Categories and Tags
You may want to consider using categories and tags to make your blog easier to navigate. A post is typically only allowed one category. In comparison, it can have multiple tags. For example, products can in a WooCommerce store (products also have categories/tags) could have categories such as ‘men’s wear’, ‘women’s wear’, ‘accessories’ while the tags would be stuff like ‘modern’, ‘budget’, ‘summer’. All categories and tags have associated pages that are automatically created featuring everything in that category/tag. There are sidebar widgets that allow you to show all of the category/tag pages to your visitors (located under appearance > widgets).
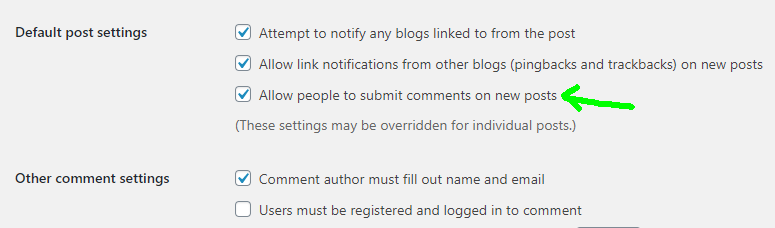
Tip #10 Turning Off Comments
This can be done under settings > discussion. You will find other settings in there that you can check out as well such as the ability to restrict commenting to logged in users or requiring comments to be manually approved.